Hi everyone - this is Eddie, Lisa's husband, with a guest appearance here on Panning the Globe to share my recipe for homemade bagels, which Lisa has described as 'the best bagels ever!'
It's so rewarding to make delicious, chewy, New York style homemade bagels. And once you try one of these freshly baked bagels out of your own oven, you may never go back to the bakery!
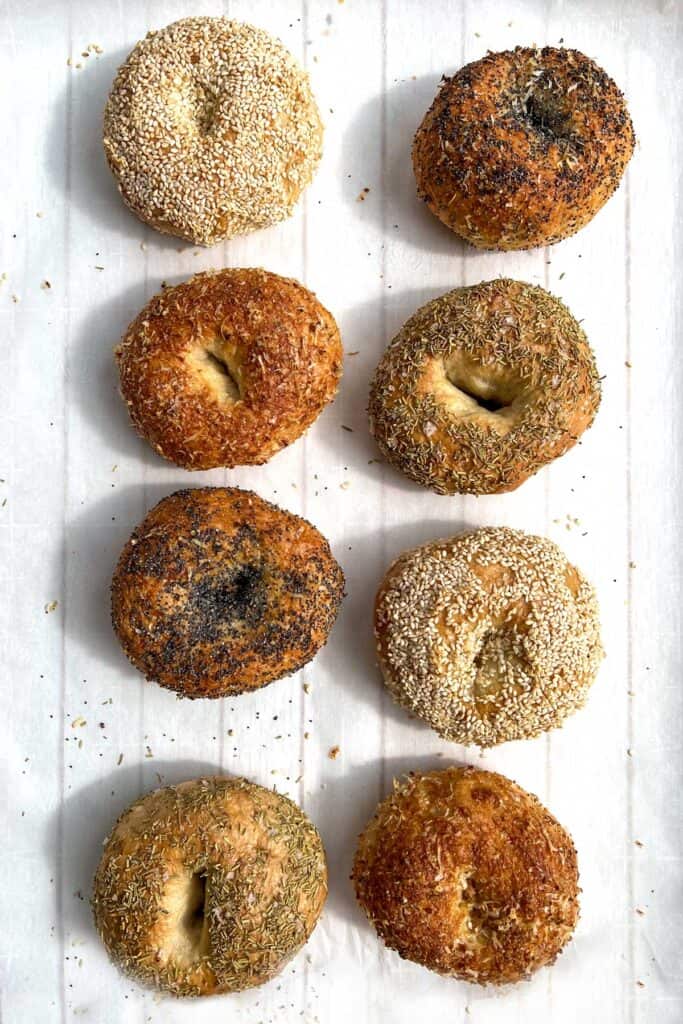
I have always loved and admired a well made bagel - crisp on the outside with a variety of seasonings, soft and chewy on the inside, toasted with butter or with cream cheese and smoked salmon - so simple and delicious! Honestly, I could eat them every morning.
HOMEMADE BAGELS
Baking bread is one of my specialties, from olive bread to bialys to bagels, and over the past few years, I have officially become addicted to making homemade bagels.
It has become bi-weekly routine for me, and in addition to producing bagels better than I can buy in any store or bakery, I find the whole process to be extremely rewarding and spiritually nourishing.
Homemade bagels are also great as gifts if you find yourself making too many, as I often do.
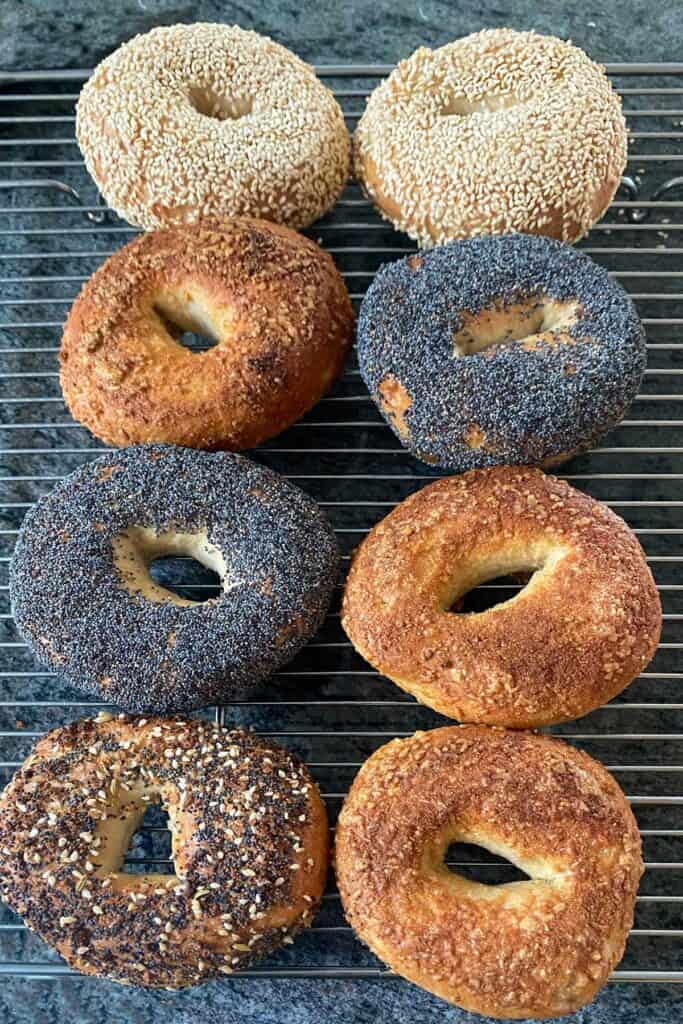
This bagel recipe incorporates what I have learned from many different sources over the years. After considerable experimentation with ingredients, proportions and timings, I feel I can finally put forward this recipe with confidence in consistently excellent results.
As an interesting point of confirmation, Lisa and I recently visited Russ & Daughters, an iconic New York "appetizing shop" that dates back to 1914. After sampling fantastic bagels there, on the lower East Side of Manhattan, we walked across the Brooklyn Bridge to the Brooklyn Navy yard location which is their production facility.
We spoke there with the Director of Operations, Rebecca Zauss who was very generous with her time, about Russ & Daughters' bagel making method. One specific question I had was how long the bagels were boiled before baking. The recipe I developed has a boil time, at a total of four minutes, that is double or more what most online recipes recommend. Rebecca responded that their boil time isn't very long at all (at this point my heart sank for a second), then she said "maybe four to five minutes". I felt such vindication!
BAGEL VARIETIES
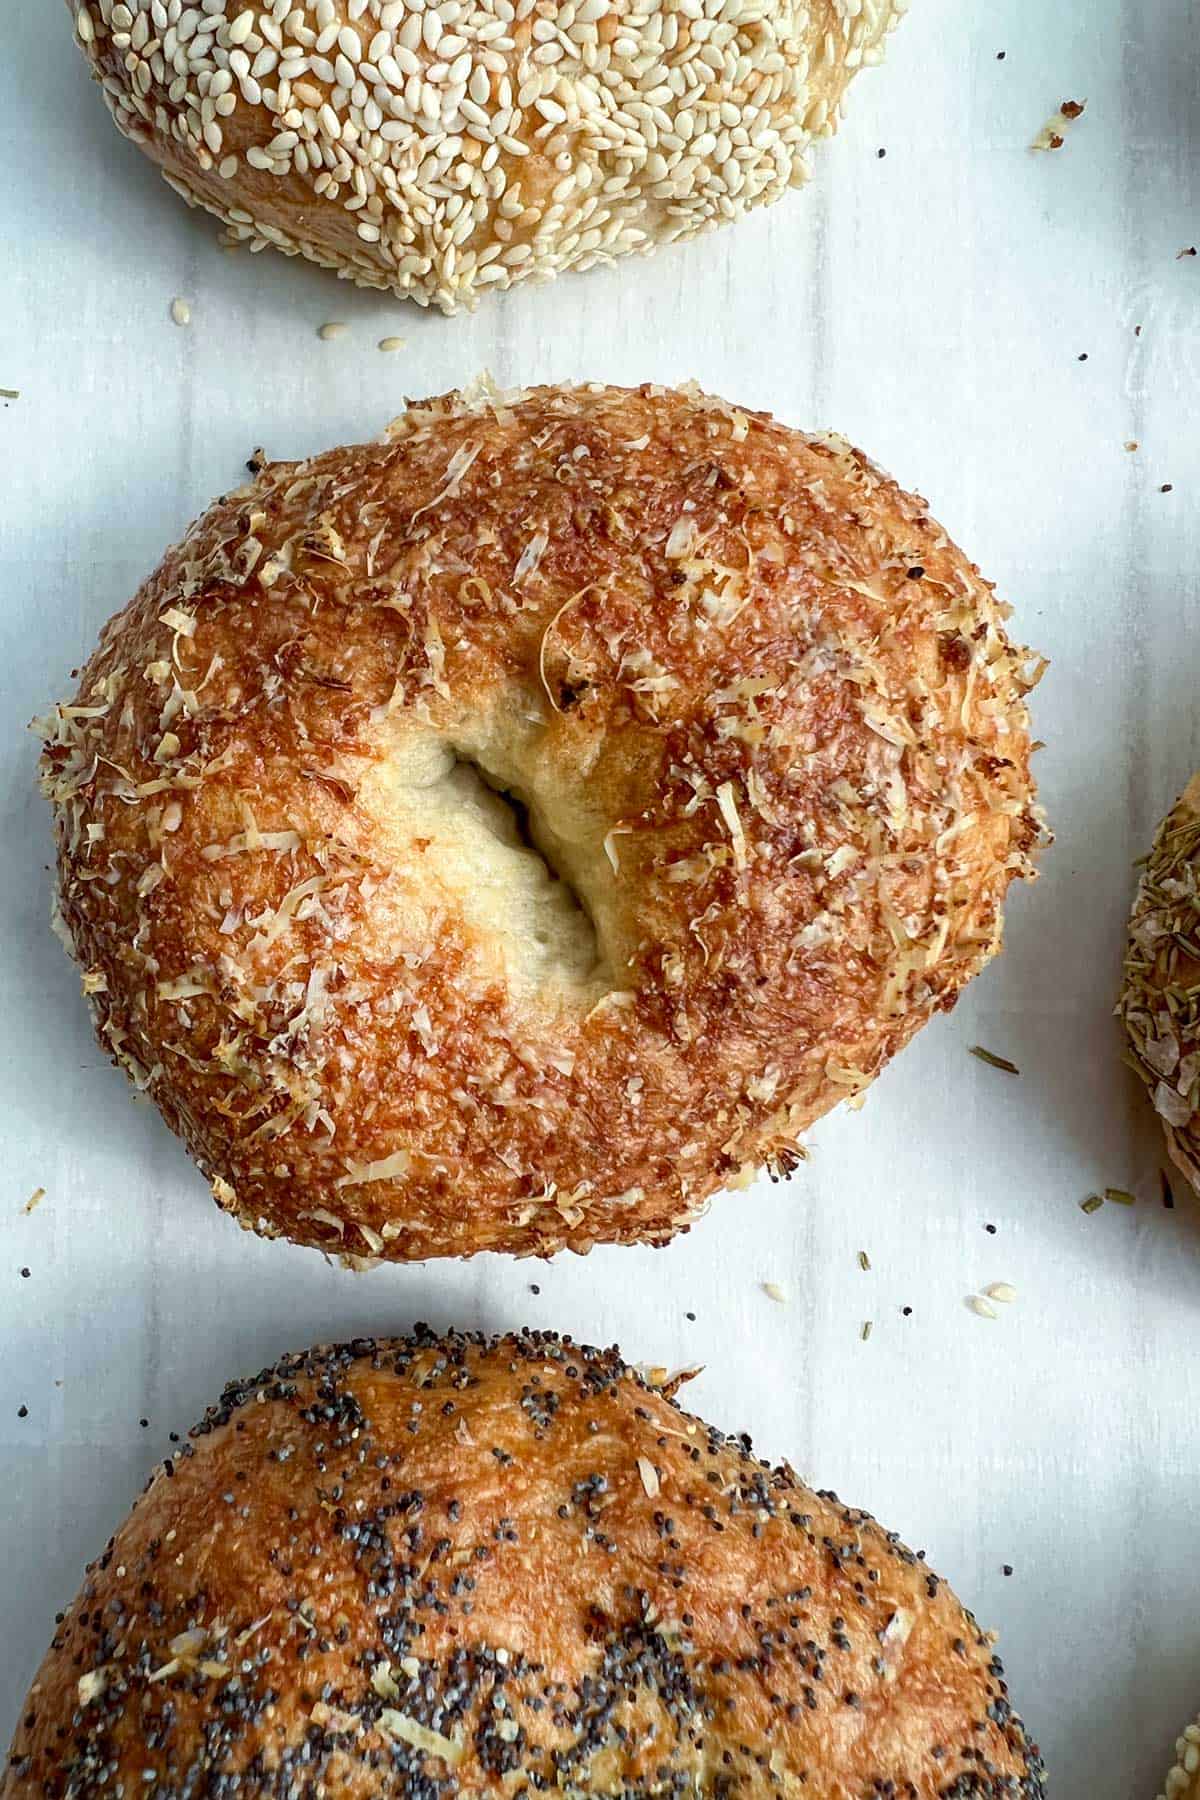
I have used a number of traditional toppings in my bagel making journey and have come up with some of my own. Once when I ran out of the toppings I had on hand, I grated some parmesan cheese and mixed it in with granulated garlic (pictured below) - this became Lisa's favorite bagel (she asked me at one point why I would bother making any other kind!)
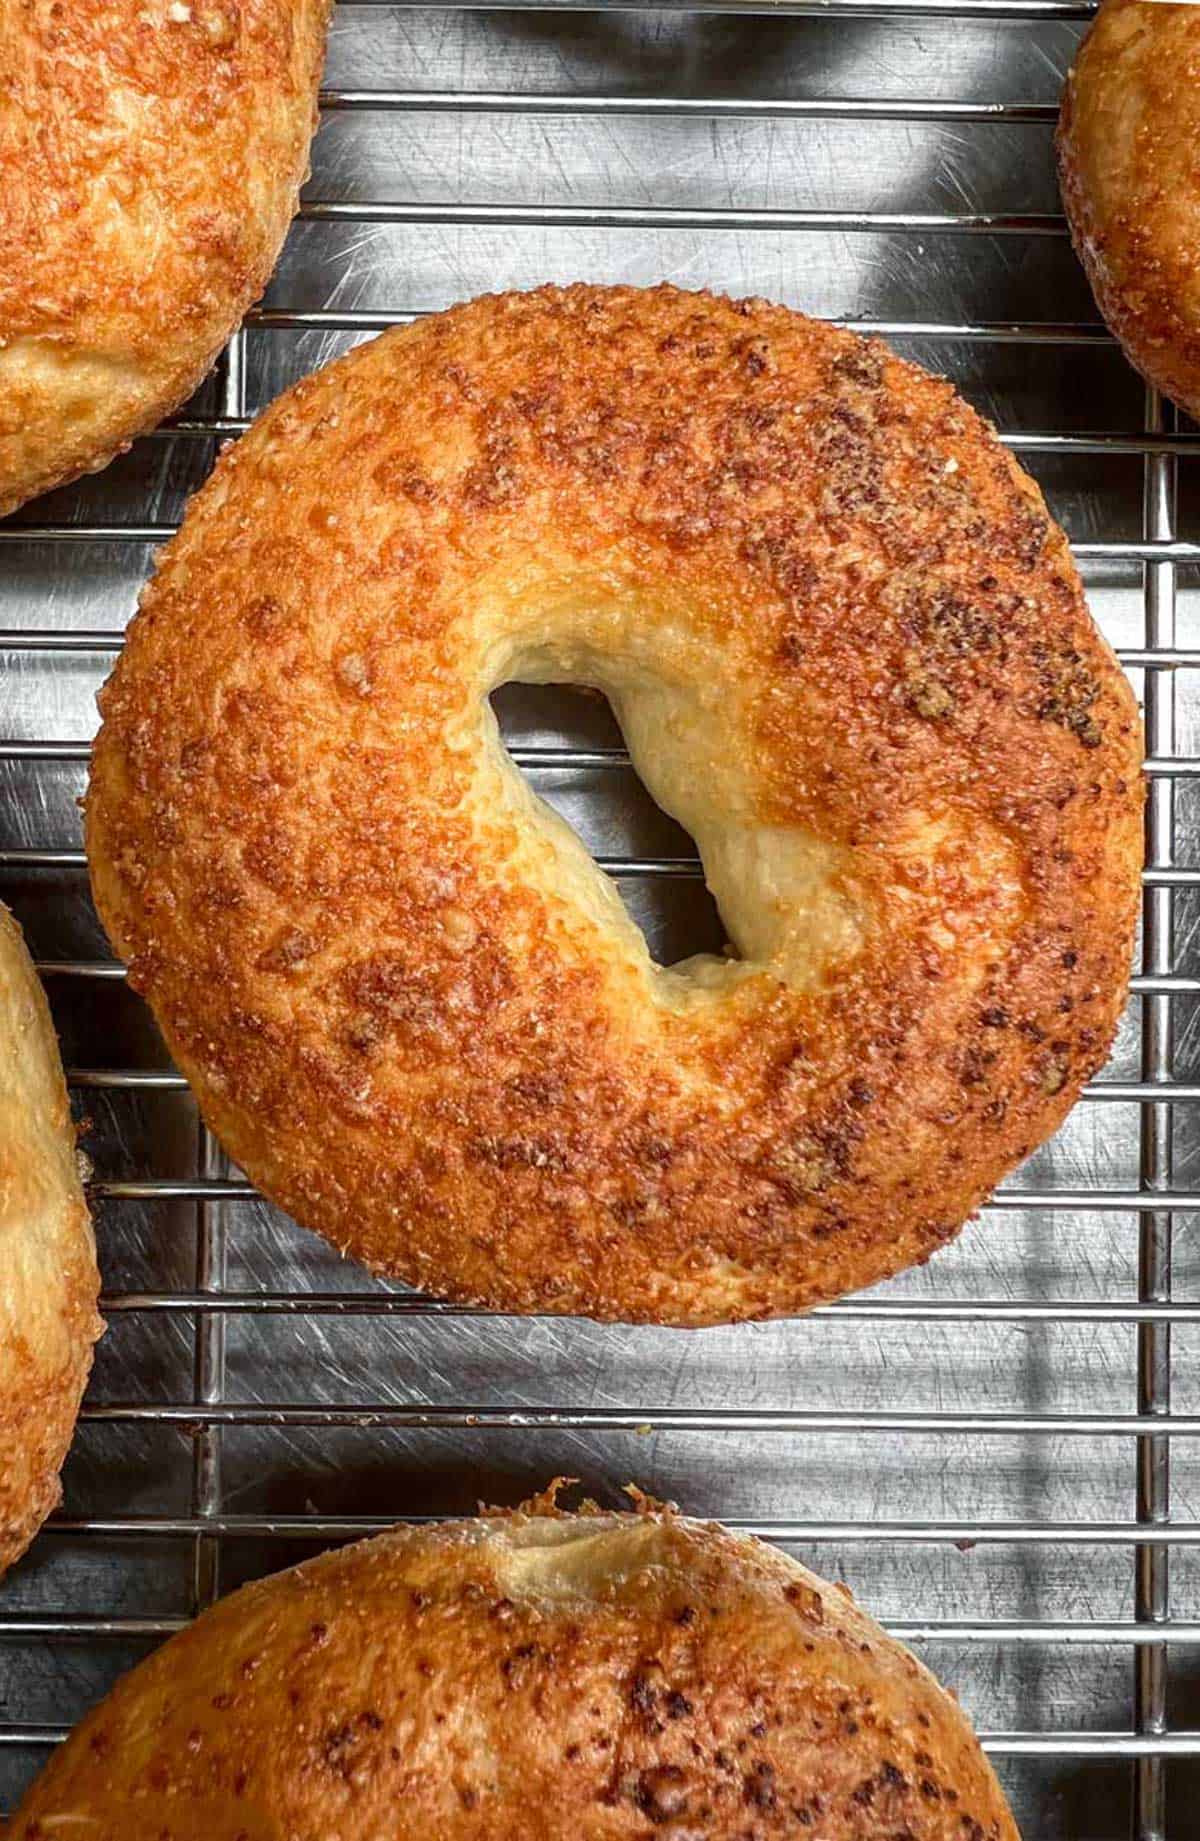
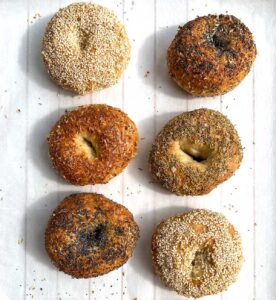
Though these parmesan garlic bagels are absolutely delicious (and the only ones Lisa ever wants), there are a variety of other bagels that I also love. Here is a non exhaustive list:
- Poppy seed bagels - a classic
- Sesame seed bagels - (white or black sesame seeds or both) - note, these require that you first brush on egg white or they will all fall off
- Everything bagels - you can buy everything bagel mix off the shelf - Trader Joe's has a nice version
- Asiago bagels - make these with fresh grated asiago cheese - so much flavor!
- Parmesan garlic bagels - topped with freshly grated parmesan cheese combined with granulated garlic (garlic powder can be substituted) - Lisa's favorite
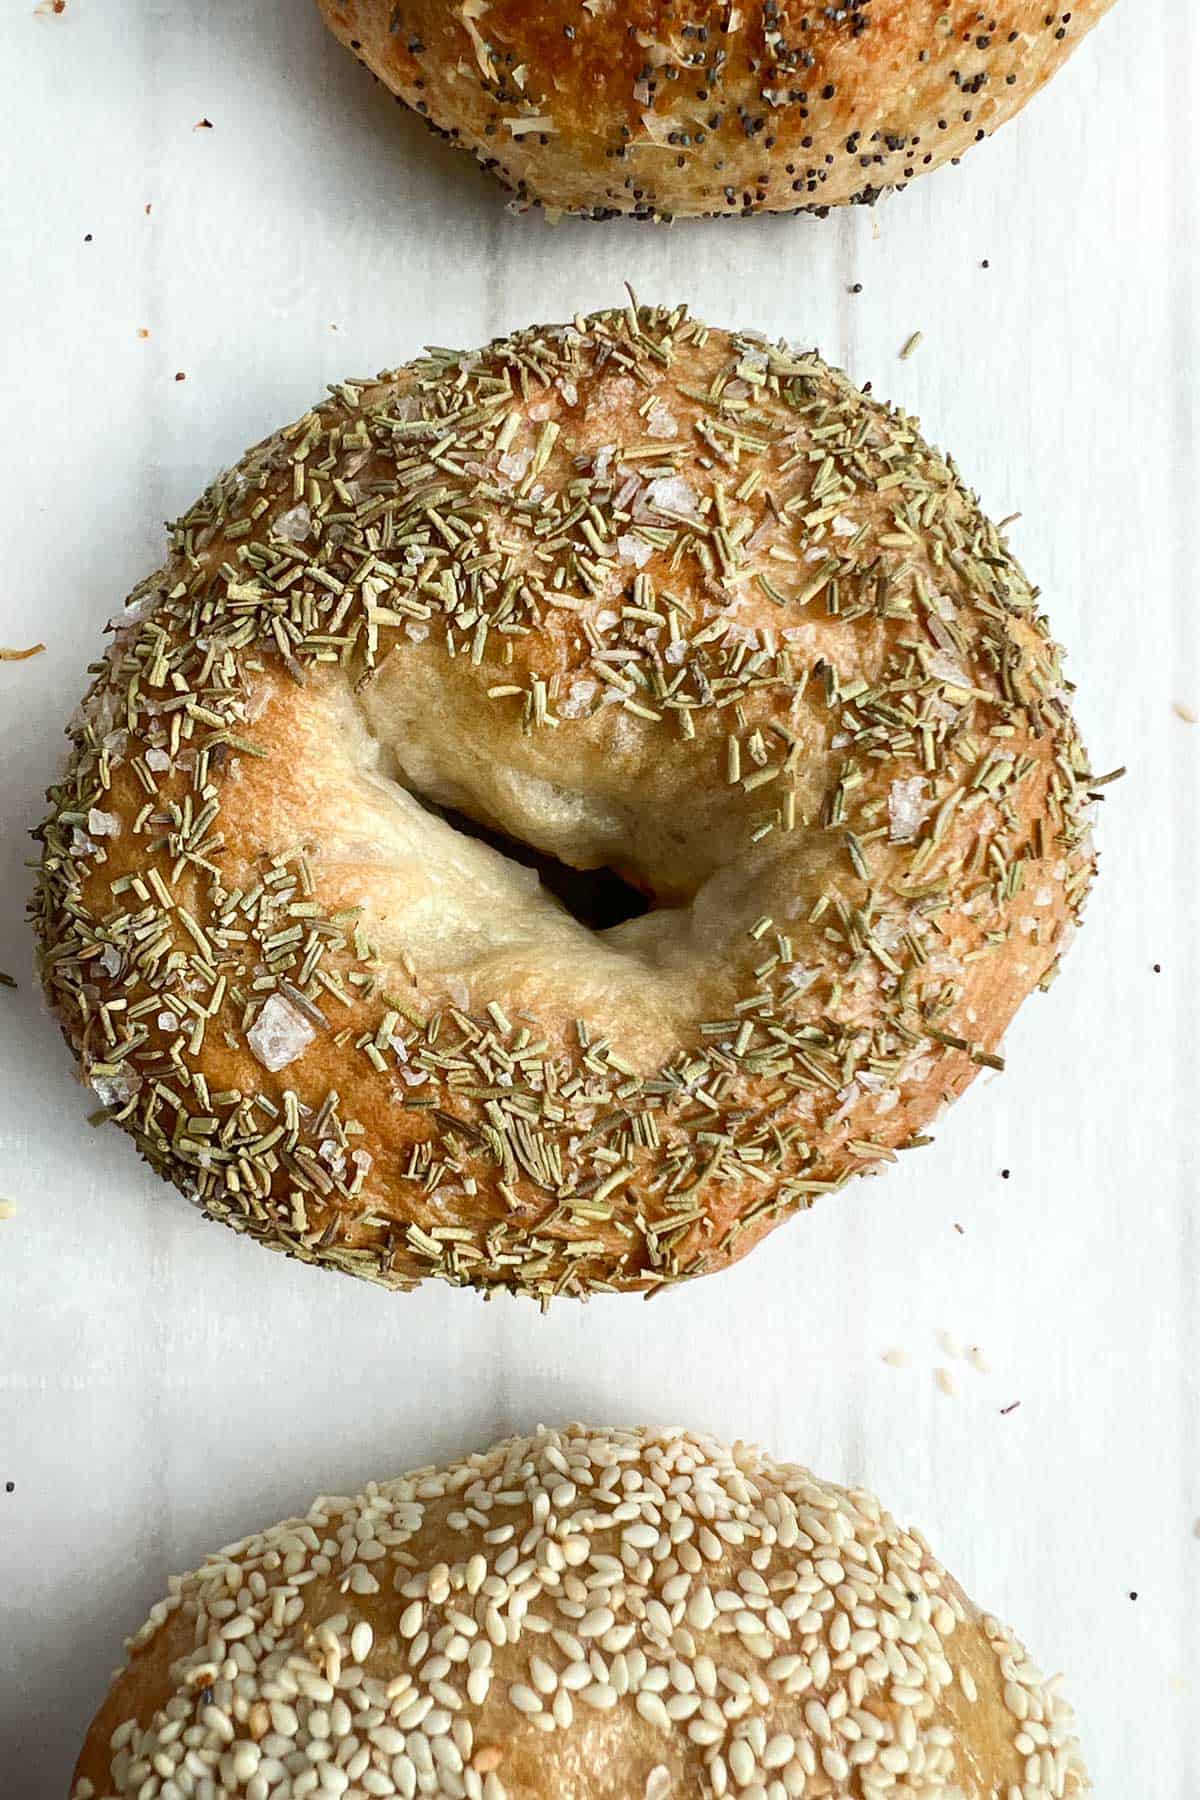
- Dried rosemary and sea salt bagels (pictured below) - my personal favorite
- Any combination of the above.
HOW TO MAKE HOMEMADE BAGELS
Making bagels is very similar to most other bread making processes except for one, somewhat jarring step: boiling the dough.
Here's the bagel making process in a nutshell: mix together flour, yeast, salt and water along with some brown sugar, form this combination into a dough, let it rise, divide it into eight equal pieces, shape into bagels, boil them, add toppings, and bake.
The whole process takes about three hours from start to finish, the majority of which is a combination of rise and bake time. I'll walk through the steps here with pictures and then provide the more detailed recipe below.
Step one - Make the dough
Here's what you need to make bagel dough
- Instant dry yeast
- Lukewarm water
- Kosher salt or fine sea salt
- Bread flour
- Brown sugar
Combine the dough ingredients in a stand mixer or large bowl (see recipe card below for exact amounts)
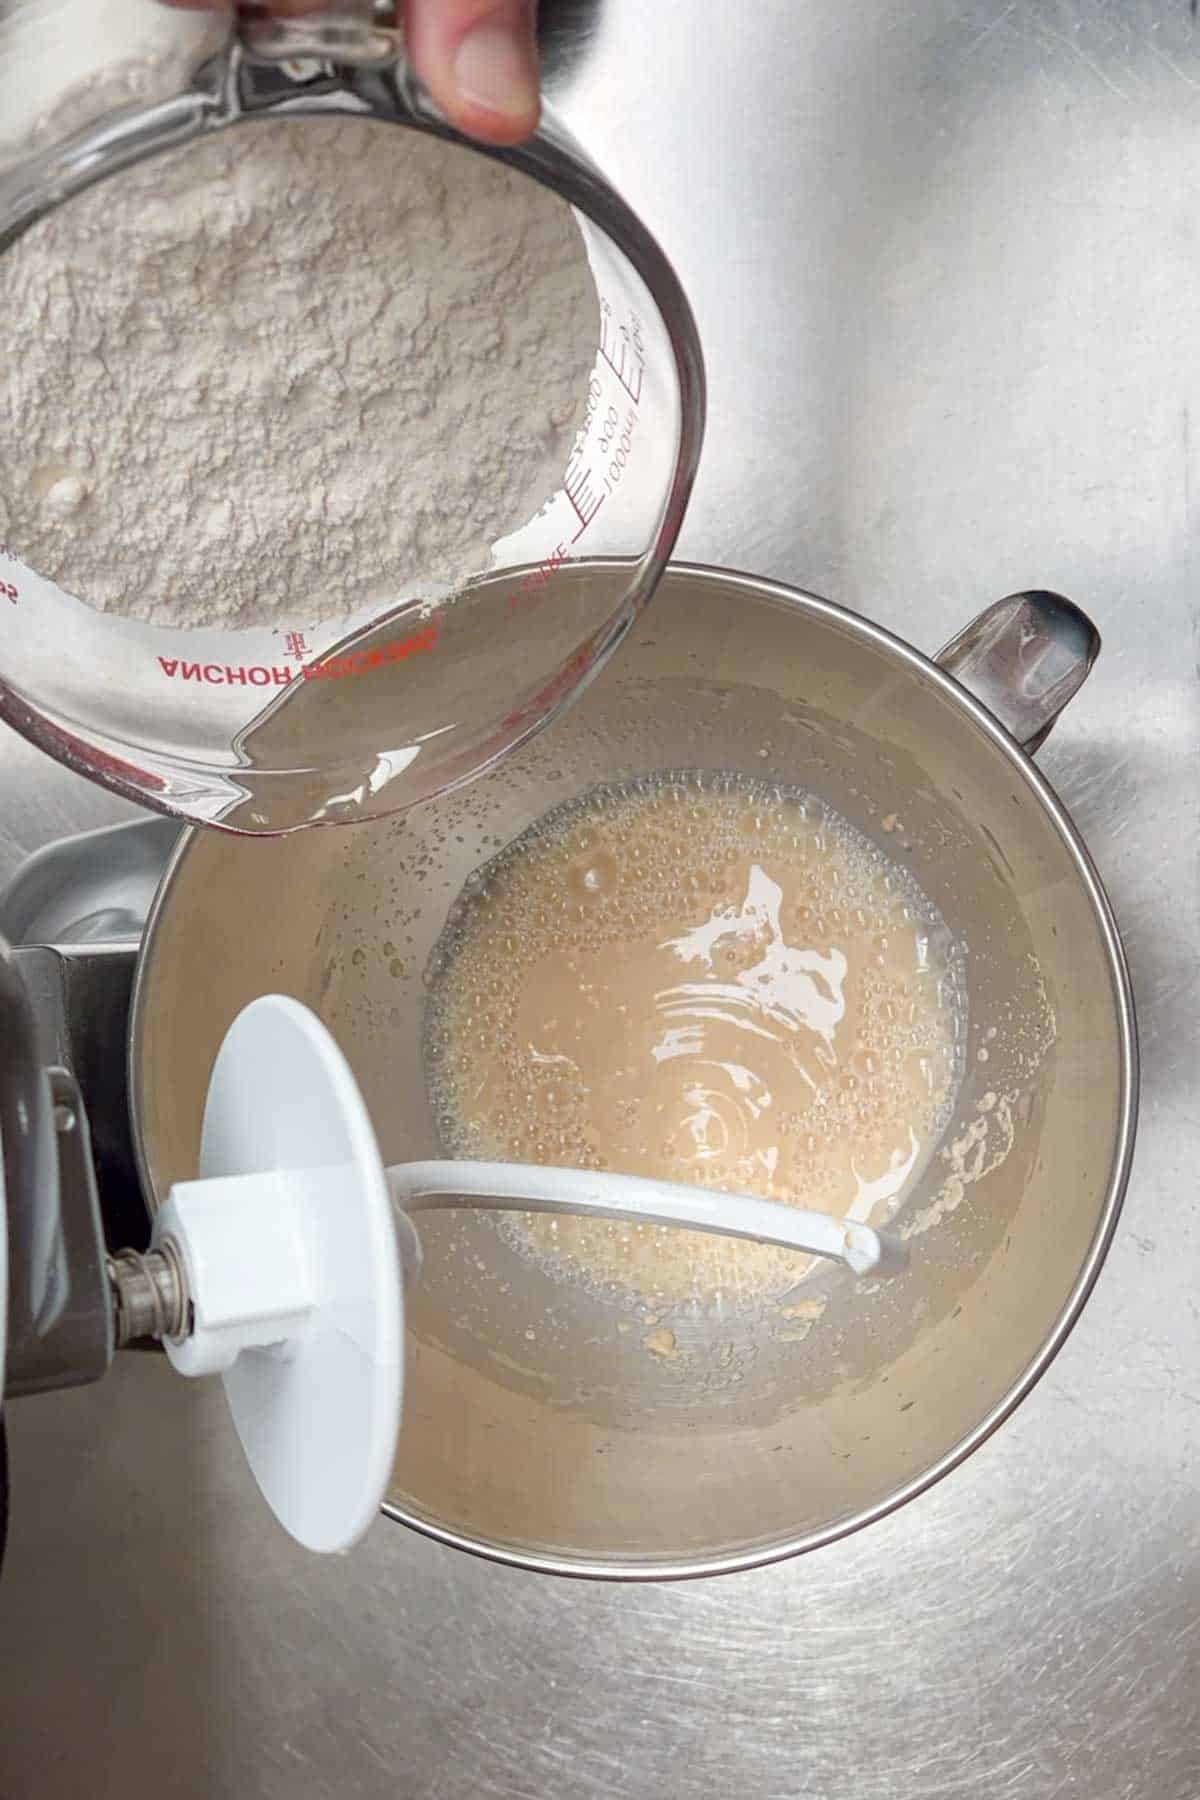
Time-saving tip: Many recipes for bagels and other bread forms will begin by having you "proof" the yeast by mixing it with warm water and letting it sit for long enough to form bubbles to show it's active. I am going to let you in on a secret - I haven't proofed my yeast (either active dry or instant) for over 15 years and have never had a dough fail to rise. Today's store-bought yeast is very reliable (I tend to use Fleischmann's or Red Star) so as long as your yeast isn't expired, my advice is just mix it all in and save yourself the time.
Step two - Form the dough
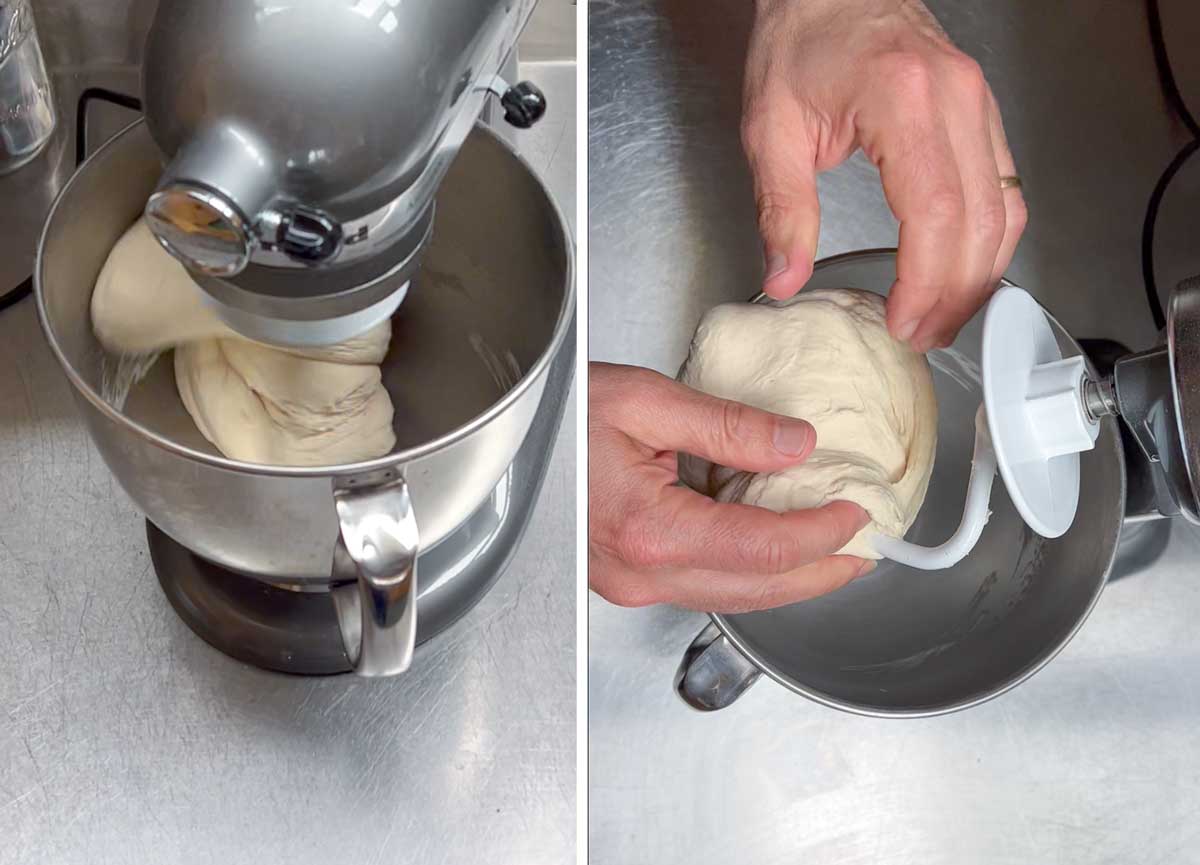
If you have a stand mixer with a dough hook, use it to form the dough, starting on a low speed and gradually moving to a medium-high speed, mixing for about 8 minutes total, and adding more flour if necessary. The goal is to create a dough that is smooth and tacky, but not sticking to your fingers.
If you don't have a stand mixer or prefer kneading by hand, fully combine the ingredients in a large bowl with a wooden spoon and then turn out onto a lightly floured surface and knead firmly for 8-10 minutes until the dough is smooth and tacky.
Step three - Let the dough rise
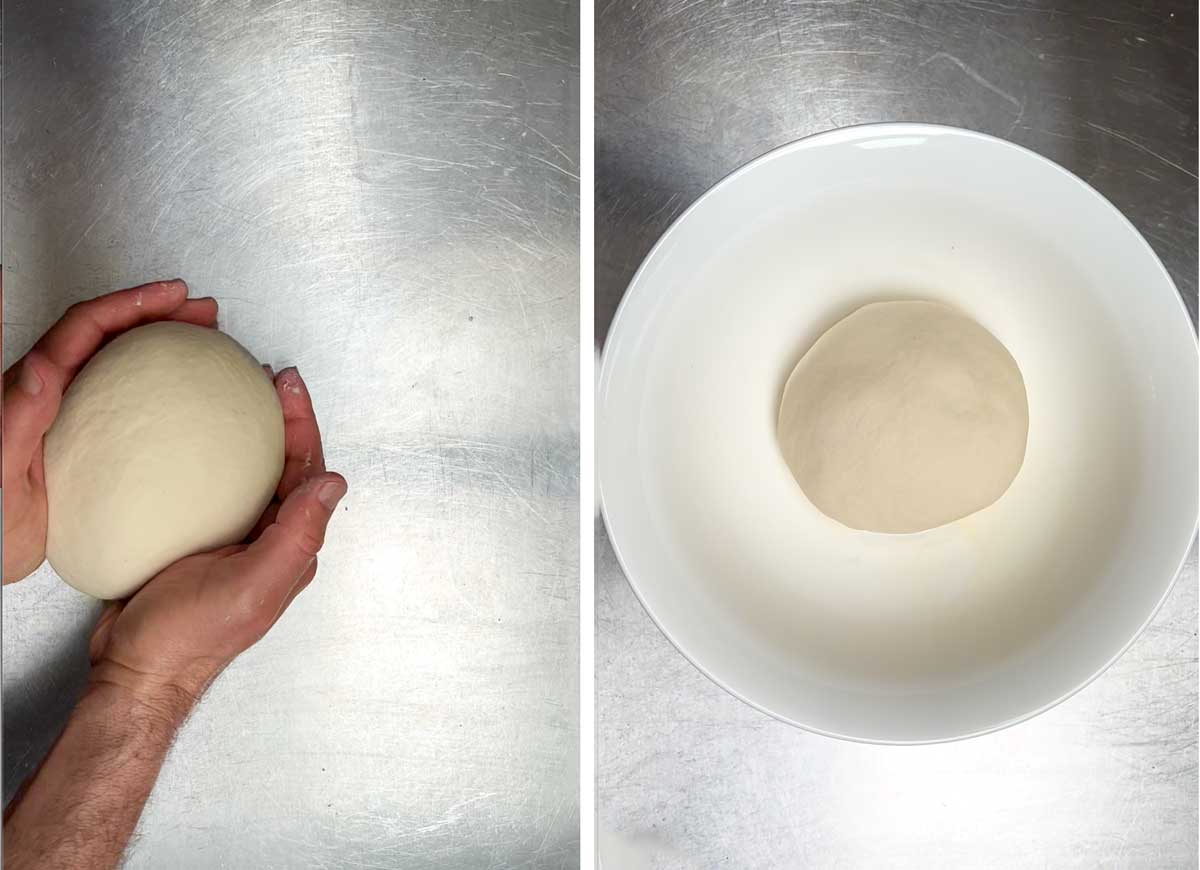
Pat the dough into a ball and place it into a large lightly-greased bowl (canola or olive oil is fine). Roll it around in the oil to coat, and leave it for about an hour and forty-five minutes until the dough is about double in size.
Step four - Divide the dough and roll it into balls
Using a dough scraper or large knife on an un-floured surface, divide the dough into approximately 8 equal size pieces, tucking the pieces under a clean dish towel as you go. I use a scale for this but you can also just eyeball it.
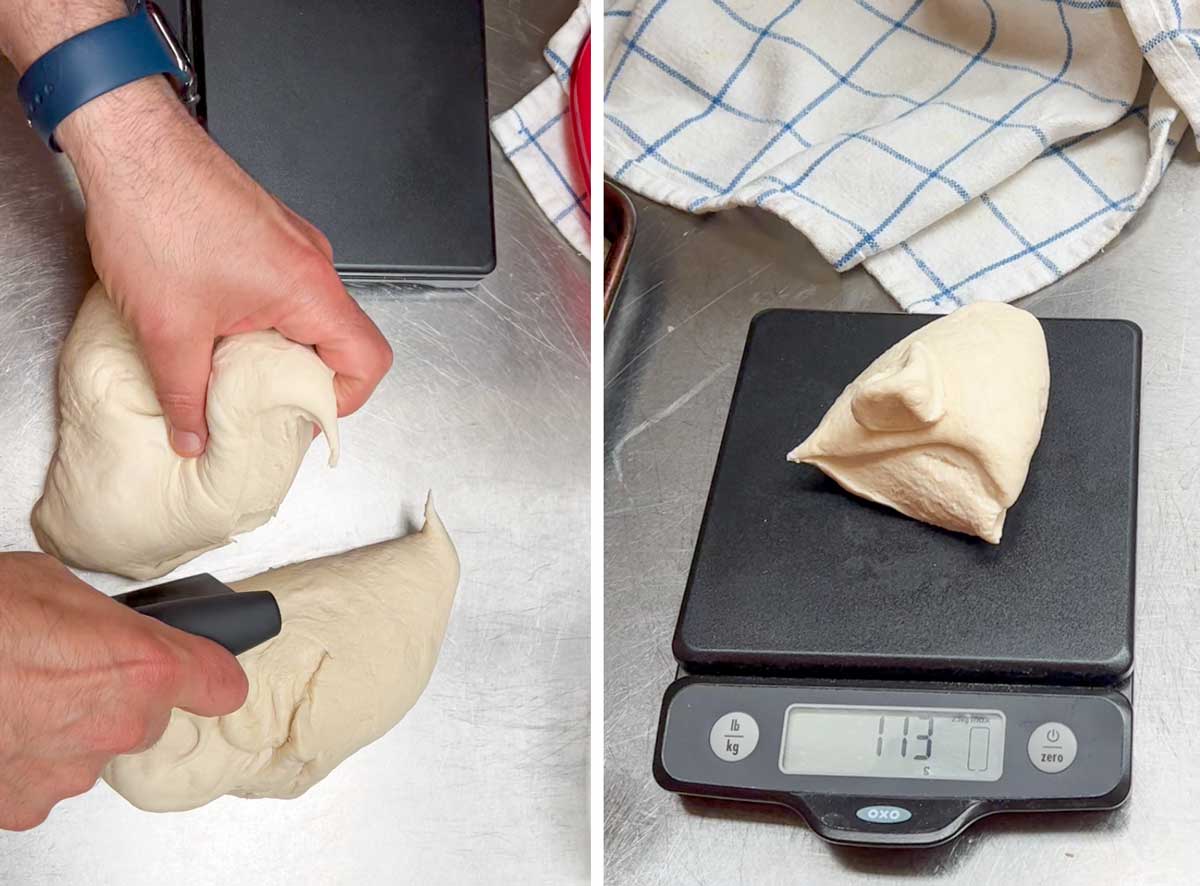
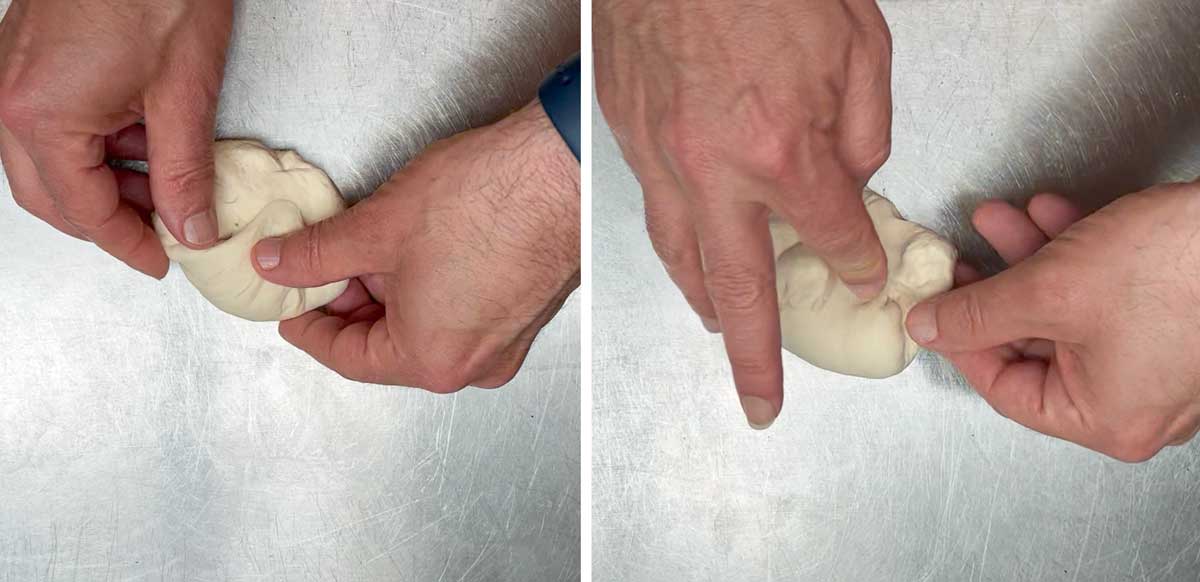
To roll the dough into balls, take each piece, set it on an unfloured surface, pull its edges up and over into the center, then flip it over (so it's folded-side-down) and with a cupped hand roll in a circular motion until a ball is formed.
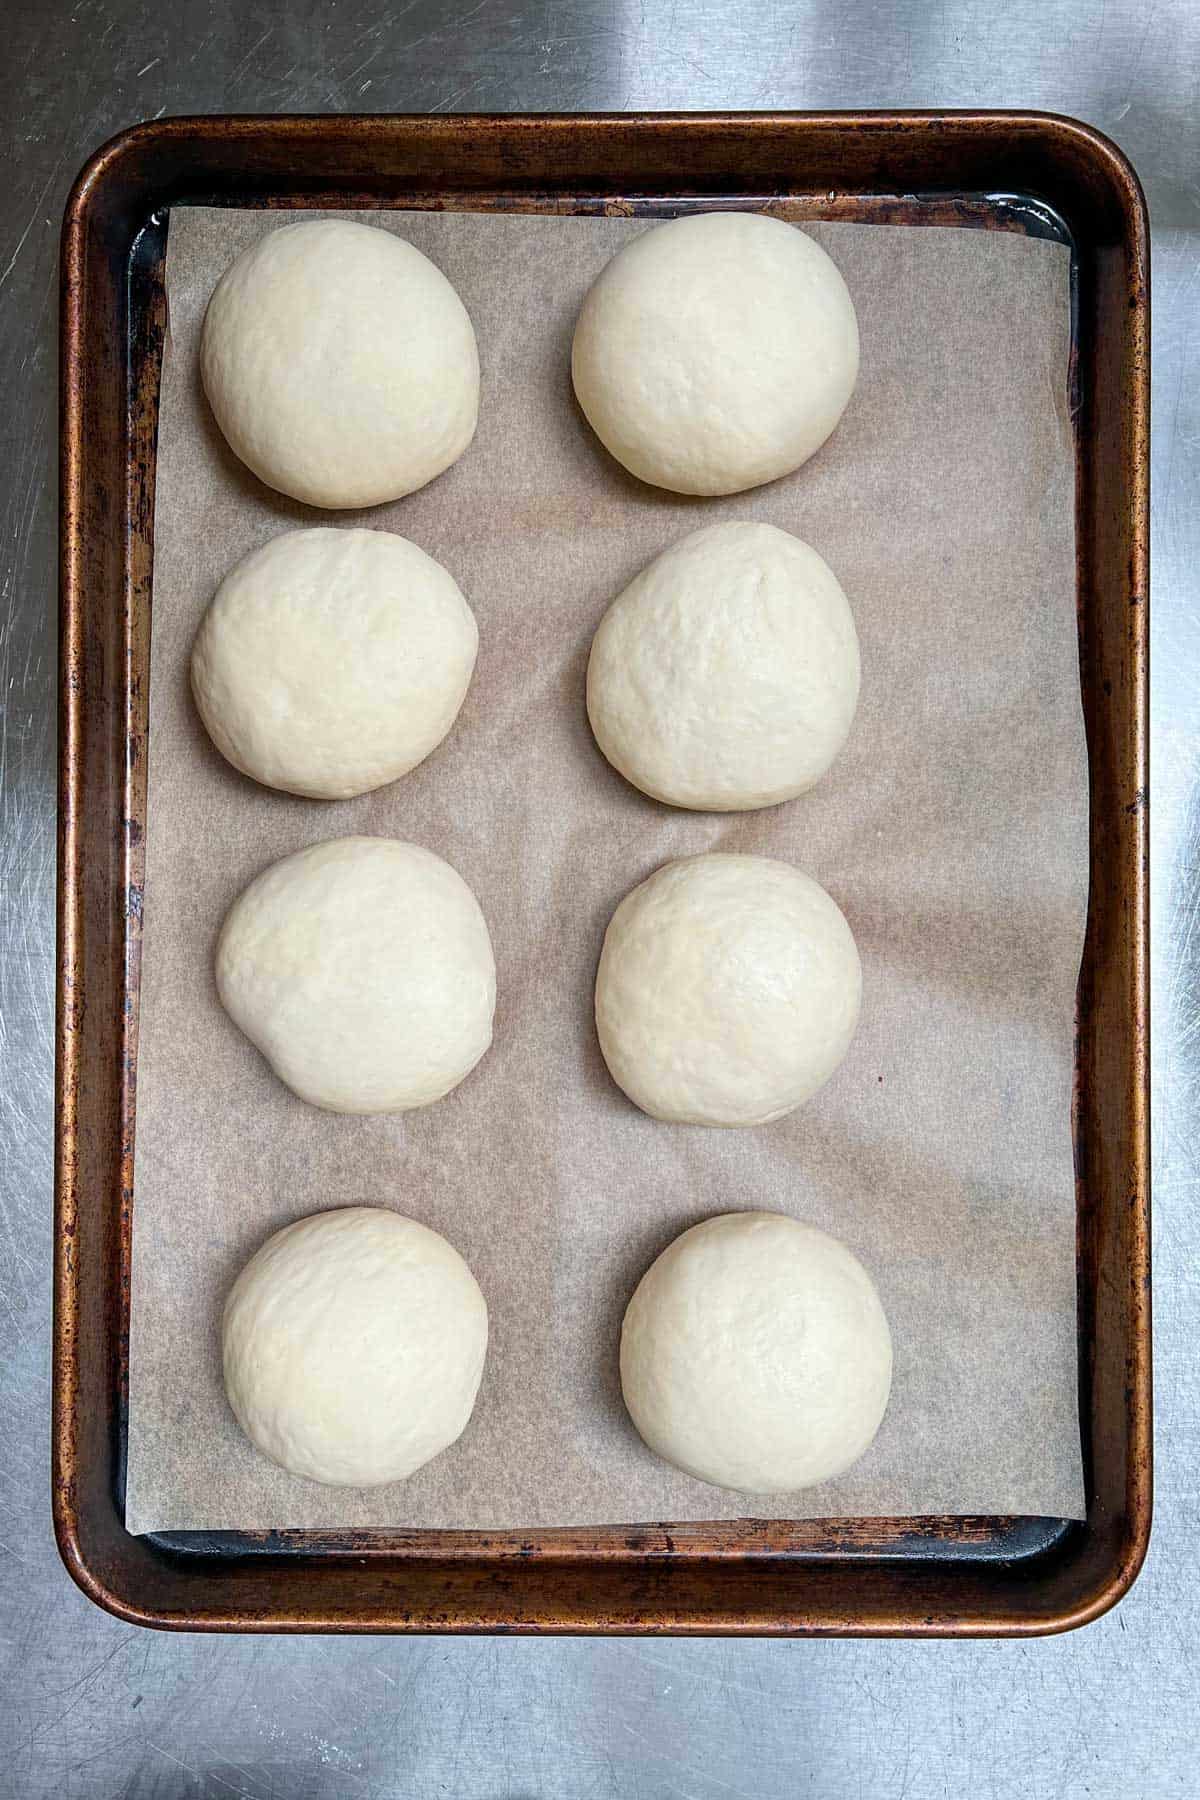
Place the dough balls on a parchment-lined baking sheet and let them sit for ten minutes while you get water boiling in a large pot (16-quart or the biggest pot you have), and preheat the oven to 425ºF/220ºC.
Step five - Shape the bagels
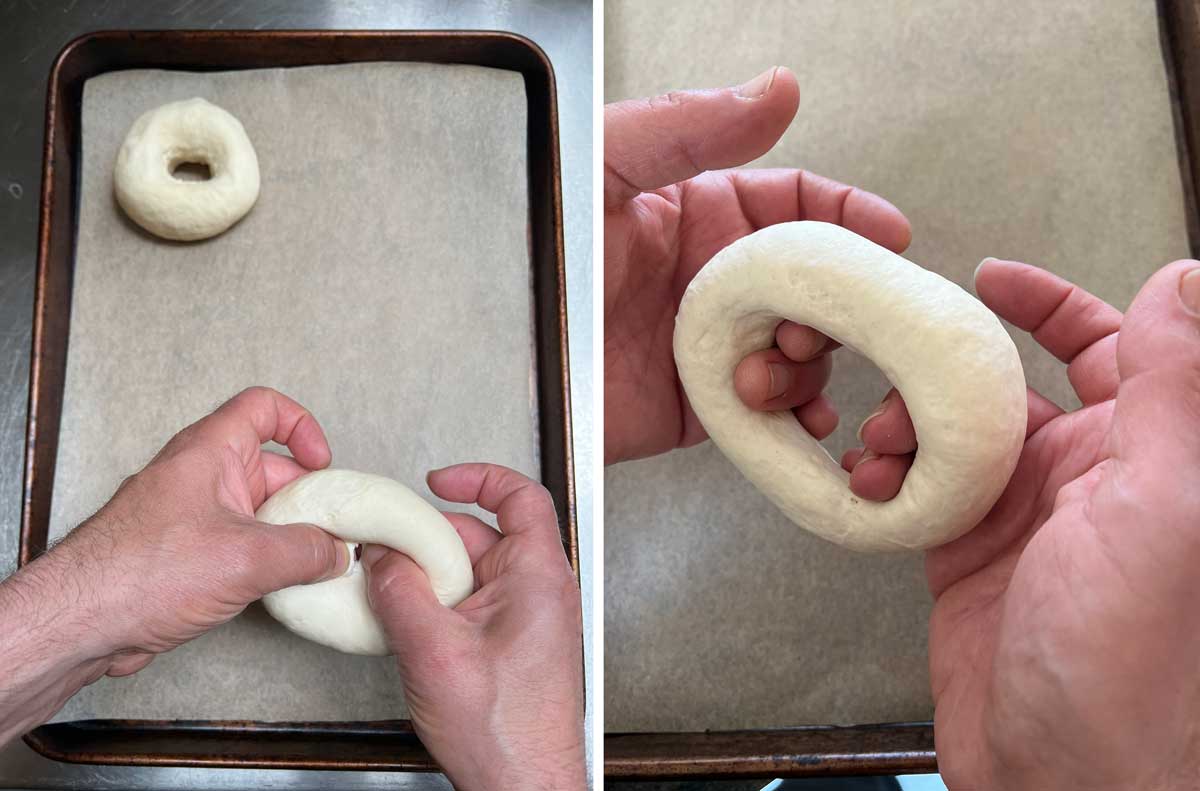
Some recipes will have you roll the balls out into strands and then form circles and join the ends. I prefer the simpler approach of just pushing my thumbs through the center of the ball and slowly expanding the hole with two or three fingers on each hand to form the bagel.
Let the bagels rise for 5-10 minutes in their bagel form on the parchment paper. By that time, the water should be fully boiling.
Step six - Boil the bagels
Add half a teaspoon of barley malt syrup (honey makes a good substitute) to the fully boiling pot of water. Then four at a time (or however many fit in your pot without being crowded against the sides) boil the bagels for 2 minutes per side.
Note - this is longer than most recipes will tell you, but after considerable testing I am convinced it is right for the perfect chew.
As you flip them over after the first two minutes, flip them towards each other versus against the side of the pot where they can sometimes stick.
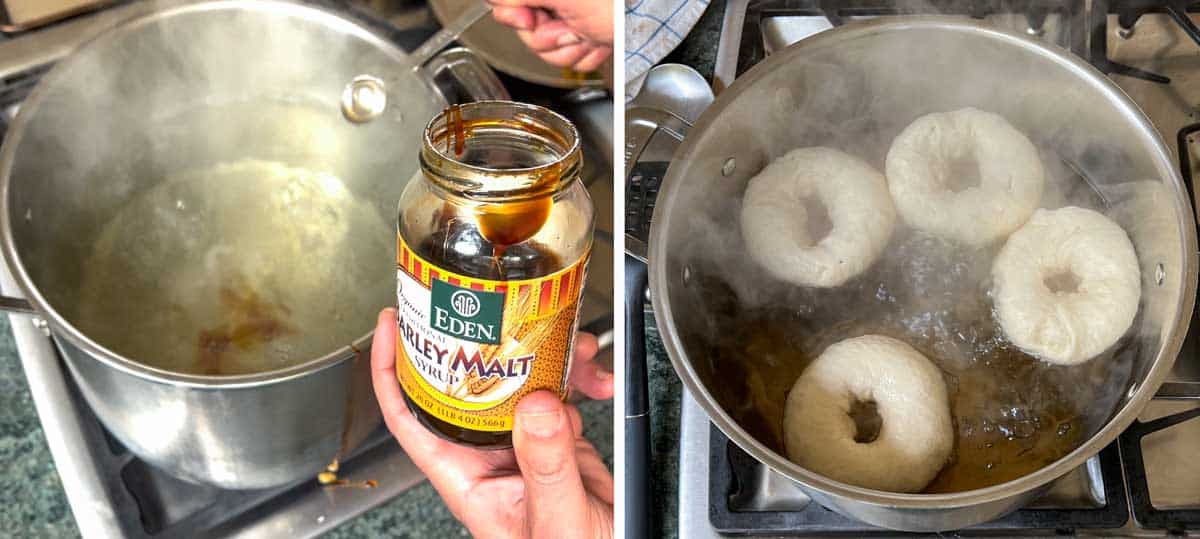
After two more minutes, remove the bagels and place them onto a clean flat surface.
Step 7 - Add the toppings
After about 30 seconds out of the boiling water, while the bagels still have a little stickiness to them (you can absorb excess water on the bottom if needed with a paper towel), press into your choice of toppings.
I have provided some ideas above for toppings. If you are using sesame seeds, brush with an egg white first - the rest of these toppings will adhere nicely to the bagel with no need for this step.
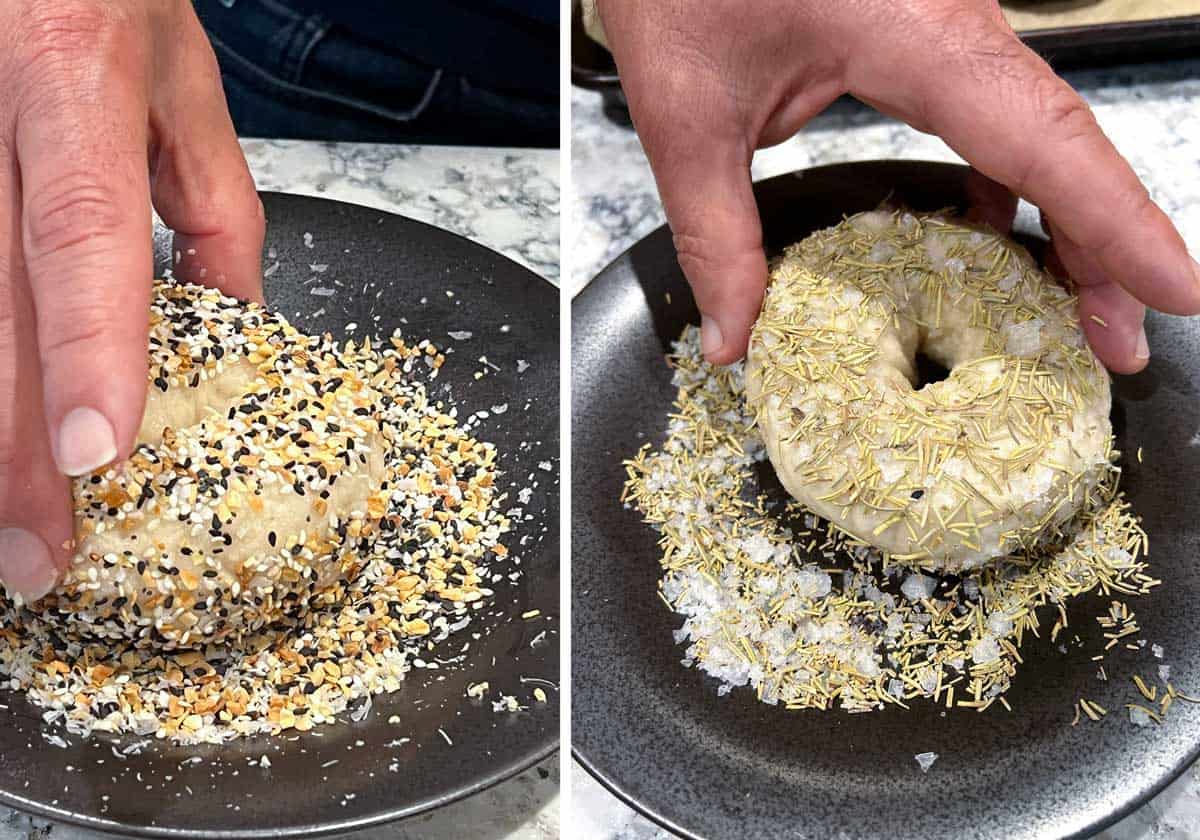
Place bagels onto two parchment-lined sheet pans.
Tip: Add the toppings to your first batch of bagels before putting the second batch in to boil. I find it is too difficult to keep track of both topping the bagels and timing their boil simultaneously.
Step 8 - Bake
Bake the bagels for 23-24 minutes at 425 degrees - or until golden brown on both sides. Set a timer initially for 12 minutes, then swap positions of the pans in the oven and bake for an additional 11-12 minutes. When fully baked, place onto a rack to cool for at least 15 minutes before eating.
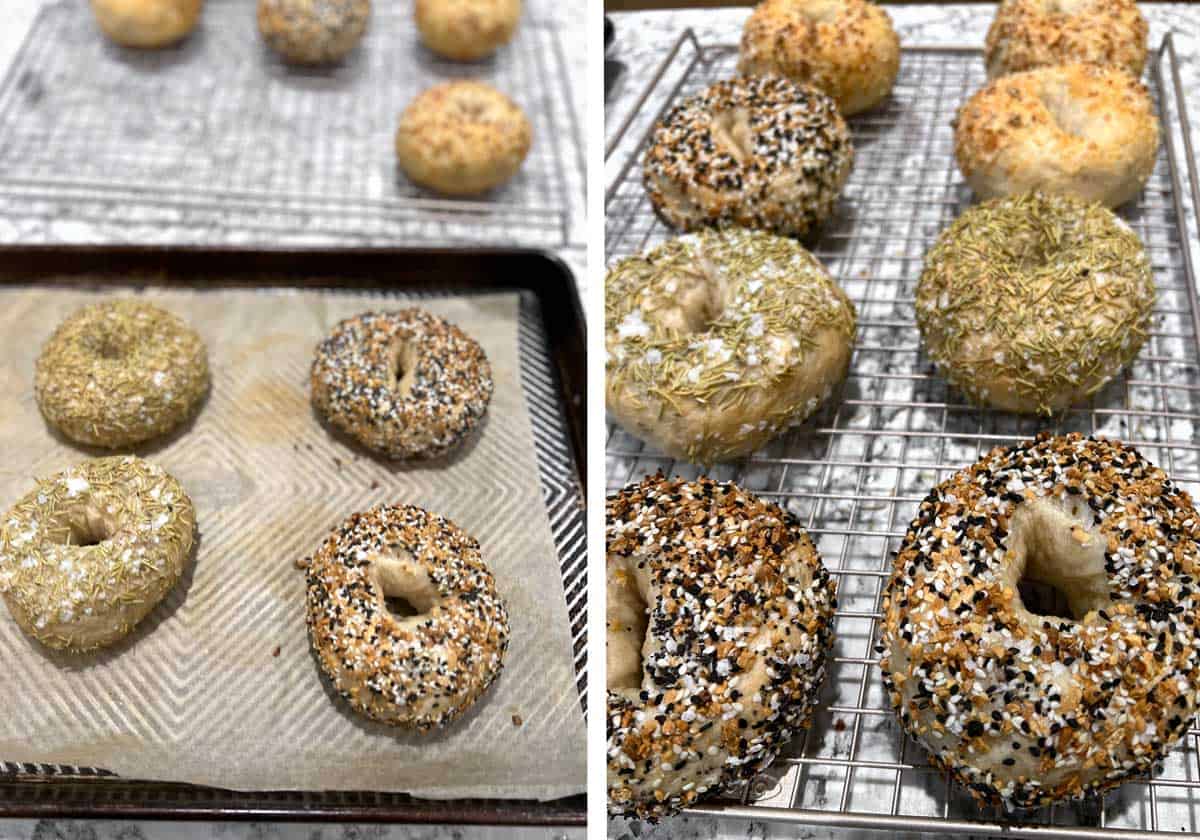
Enjoy!
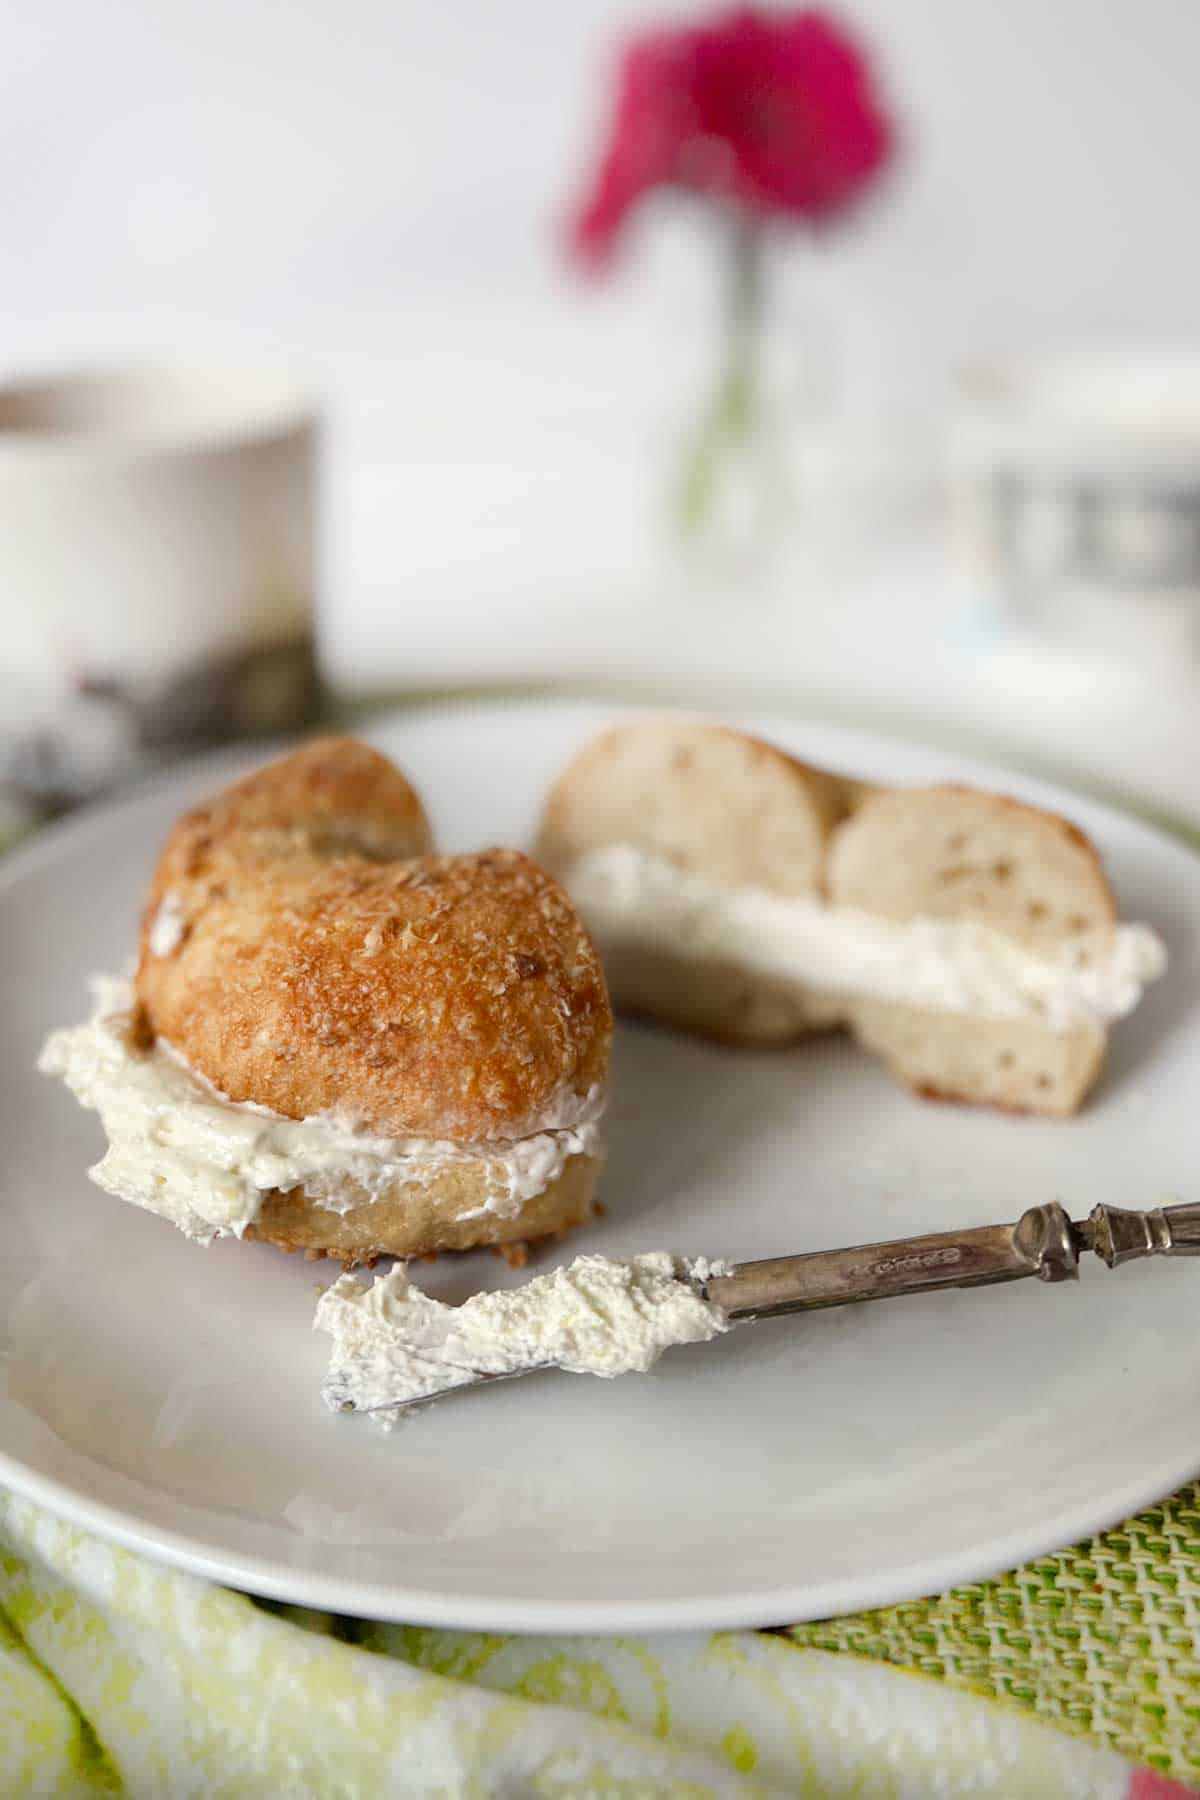
I would advise that you have at least one bagel fresh out of the oven (after 15 minutes). Even though they have just been baked, I still like to slice and toast them at this point.
These bagels are so delicious I usually put nothing more than butter on them and perhaps a little bit of sea salt.
How to store bagels
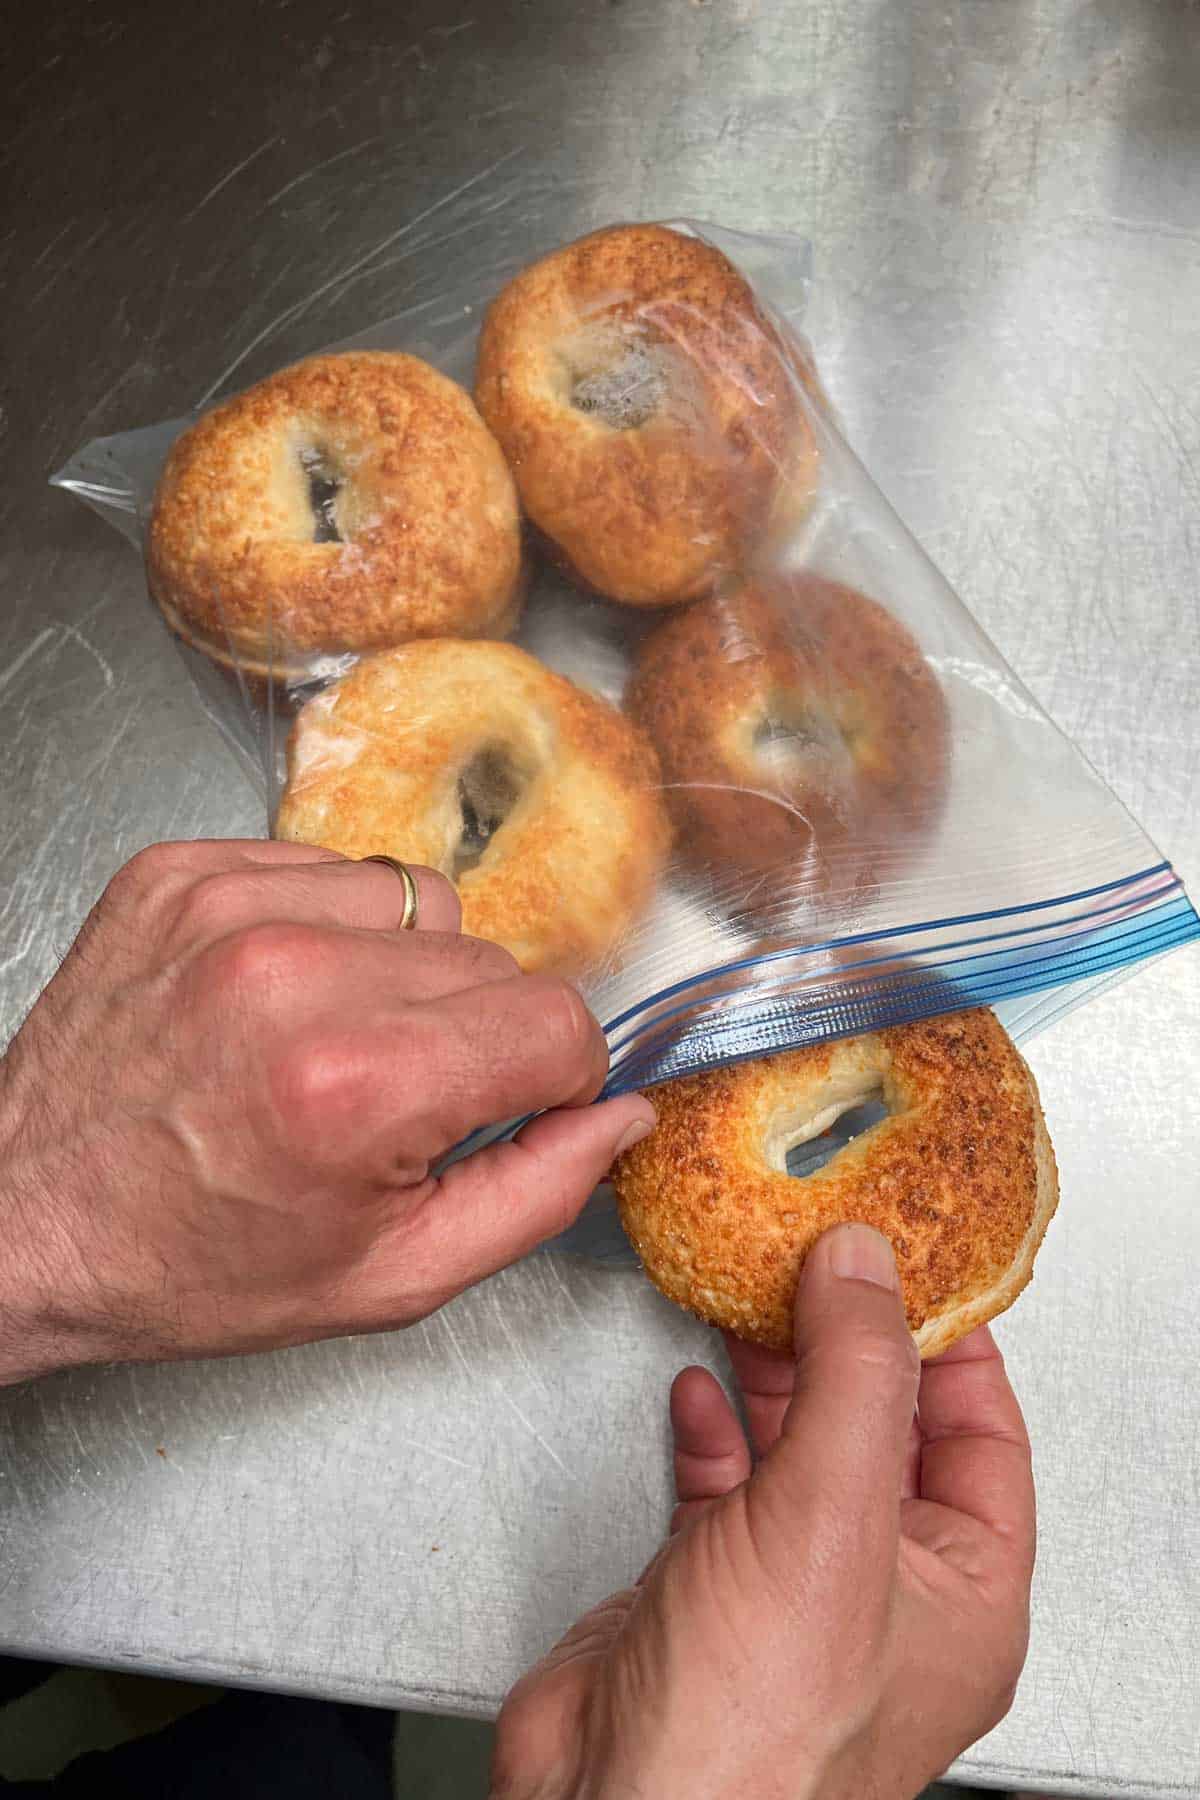
Please, please slice and freeze any bagels you don't eat within hours after baking - I feel like any freshly made bagel that sits out more than three hours is going stale by the minute and it drives me nuts!
Even if you are planning to eat them the next morning, I am going to have to insist that you slice and freeze your bagels within three hours after making them. Allow them to thaw for half an hour before toasting - you will be amazed at the difference this makes. Ok, I feel better now.
If you make these homemade bagels, I hope you'll come back to leave a star rating and a review. Lisa and I would love to know what you think!
PrintRecipe
Homemade Bagels Recipe
- Total Time: 3 hours
- Yield: 8 bagels
Description
Making your own bagels is good for the soul, I am convinced. And once you try a delicious, freshly baked bagel out of your own oven, you may never go back to the bakery!
Ingredients
- 2-¼ teaspoons instant yeast (2-¾ teaspoons active dry yeast can be substituted)
- 1-½ cups lukewarm water
- 2-¼ teaspoons kosher salt
- 1 tablespoon dark brown sugar
- 530 grams bread flour (or 4 cups, weight is more reliable if you have a scale); all purpose flour can be substituted
- Canola oil for greasing the rising bowl
- Your choice of toppings (sesame seeds, poppy seeds, grated parmesan or asiago cheese and garlic, dried rosemary and sea salt, "everything bagel" mix, etc.)
- 1 egg white if you are using sesame seeds
- ½ teaspoon barley malt syrup (honey can be substituted)
Instructions
- In the bowl of a stand mixer, add yeast, lukewarm water, salt, brown sugar and flour. Combine at low speed until flour is fully incorporated and then move to medium high speed for 6-7 minutes until dough is smooth and tacky. If it is still sticking to the sides of the bowl in a substantive way or to your fingers, add more flour a little at a time until the desired consistency is reached. If you are not using a stand mixer, combine ingredients in a large bowl and stir with a wooden spoon until well combined. Then turn out onto a lightly floured surface and knead for 8-10 minutes until smooth and tacky, adding more flour a little at a time, if needed.
- Form dough into a ball and place into a large bowl lightly greased with canola oil or cooking spray, roll around to coat, then cover with plastic wrap. Leave to rise at room temperature for one hour and 45 minutes until dough has approximately doubled in size. Doubling in size is the more important reference point here; if it takes more time, let it continue to rise.
- Turn the dough out onto an unfloured surface, divide into 8 approximately equal pieces or use a scale. (Each piece will be between 111-113 grams.) Keep the dough pieces covered with a dish towel, as you work to prevent drying out.
- Form each piece of dough into a tight ball. To do this, first place a piece of dough onto an unfloured surface and pull its edges up and over into the center 6-8 times, then flip it over (seam-side-down) and with a cupped hand roll in a circular motion until a ball is formed (see photos in the post). Place balls onto a parchment covered baking sheet and cover with a clean dish towel. Let sit for 10 minutes while you preheat the oven and boil the water.
- Pre-heat oven to 425ºF/220ºC.
- Fill a large pot (preferably 16 quarts or more) halfway with water and bring to a boil.
- Using a little flour, stick both thumbs through the center of a dough ball and then gently stretch the hole with your fingers to a width of about 2 inches (it will shrink back) and place bagel-shaped dough back onto the parchment-covered baking sheet. Repeat with remaining dough balls, and let them rest for five minutes while the water comes to a complete boil.
- Prepare whatever toppings you want to use on small plates in advance so they are ready for the next steps which will move fast.
- Mix ½ teaspoon of barley malt syrup or honey into the boiling water. Place four bagels (or however many will fit into the pot on the surface of the water without touching the sides) and boil for 2 minutes. Flip bagels over using a spatula and boil for another 2 minutes.
- Remove bagels from pot and place onto a clean cutting board or countertop. (Time is of the essence here so add the toppings to this first batch before boiling the remainder of the bagels.) After about 15-20 seconds out of the boiling water, pick up bagels one at a time, pat lightly onto a doubled paper towel to remove excess water and then press each side firmly into the topping(s) of your choice. If you are using sesame seeds, brush with egg white before doing this or the seeds will fall off after baking. Place bagels onto parchment covered baking sheets (4 bagels per sheet). Repeat the boiling and toppings process with the remaining bagels.
- Bake bagels for a 23-24 minutes, switching the positions of the baking sheets halfway through. Remove from oven when golden brown and transfer to a cooling rack.
- Let rest for 15 minutes before eating (see note below on slicing bagels). After the bagels have cooled, for any you don't intend to eat within the next 3 hours or so, slice them in half, place in freezer bags and put into the freezer. Thaw these out for half an hour before toasting. Enjoy!!
Notes
Note on slicing these bagels: to minimize the loss of topping when you slice bagels fresh out of the oven, I advise that you hold them with a paper towel while you cut them vs your bare hands.
- Prep Time: 45 minutes
- Rising Time: 1 hour, 45 minutes
- Cook Time: 30 minutes (boil and bake)
- Category: Bread
- Method: Boil and Bake
- Cuisine: New York





Alex
I finally got around to making these and they did not disappoint. They are even better than they look in the pictures!
Brian
I just made these bagels. The recipe is great and it was a fun process. The bagels came out incredible. I did garlic Parmesan, everything, and za’atar. Thanks for the awesome recipe!
Maxine Fick
Years ago I made bagels using a recipe for pumpernickel bagels (my favorites) from King Arthur. I assume that I can follow the above recipe just using pumpernickel flour. Is that right?Also, I remember adding non diastolic malt powder to the water I boiled the bagels in. Does the honey take the place of that?
Eddie
Hi Maxine,
I have never used pumpernickel flour for bagels, but it appears that using the same proportions would work. With respect to the boil, I use barley malt syrup for this vs a powdered malt powder. You can usually find it in Whole Foods and other higher end grocery stores, but if not, honey works just fine.
Sandi
Hands flown THE best bagel recipe! The recipe and steps are crystal clear. They’re so chewy and just perfect! Thank you for this!
Anne
Amazingly good.
Excellent, clear instructions.
I have already made 3x.
Suzanne
These are A.MAZ.ING!! So easy and delicious! The texture and flavor are perfect. Love the suggestion to cut them in half and freeze them, they really hold up well and keep their chewy texture. So glad I found this recipe and tried them. Today was my 3rd time making them….definitely a keeper!
Eddie
Hi Suzanne - wow, thanks so much for your comment - made my day! I am so glad you are enjoying this recipe.
Jon Levitt
Just completed my first bagel making experiment and it was a huge success. I followed the recipe exactly and the bagels turned out so delicious. Ed’s suggestions were all spot on, especially the weighing of the flour and switching the trays in the oven during baking. Can’t wait to do this again!
Clif
My wife Carol has had fantastic results making many of your recipes so when I saw Eddie’s post, I knew it was my turn to give this a try! Now, I am not a baker, but with a little coaching from my daughter Fiona (the real baker in our family), and this wonderful recipe, I got fantastic results and had fun in the process. I expect this will be a regular weekend activity now that I am the family bagel guy! Thank you both Eddie and Lisa!
Eddie
Hey Clif - so glad to hear that you have joined Team Bagel. There is a special pleasure, I find, in most breadmaking pursuits, but these bagels take it up a level because of the boil and the toppings which allow for creativity and differentiation. My expectations for a designer like yourself are high!
Lisa
Lucky me that making bagels has become your passion Eddie. They truly are the best bagels ever - especially the parmesan garlic bagels. My favorite preparation is toasted and topped with thinly sliced avocado, tomato and onion. Thanks for sharing your wonderful recipe here on blog!
Eddie
Aw, thanks Honey!
Linda
Very well-written recipe! A couple of questions: I notice the yield is '16 bagels' - but the dough is divided only into 8 pieces. Can you clarify please? Also - I'm no longer good at mixing and kneading dough, so I use my bread machine to mix the dough, then form and bake in the (appropriate shape/pan) in the oven. Any suggestion on a kneading time to set for the bread machine? (I'm guessing 10-15 min, and eyeballing it to see when it turns smooth "like a baby's bottom", then placing it to rise in the bowl.) Thanks again for all the great tips!
Eddie
Hi Linda - thanks for the compliment - there is a lot of passion and information in that post! I am not actually sure where you are seeing a yield of 16 bagels. Did you possibly press the 2X button at the top of the recipe? Please let me know. At 1X, it should say 8. As to using a bread machine, I am not an expert there. We received a bread machine as a wedding gift and I used it only once over 30 years ago and some how managed to bake a number of the bread machine parts into the bread itself. I would follow whatever instructions your particular machine provides, but yes, in the end you are after smooth and tacky (slightly sticky but the dough doesn't adhere to your fingers or counter surface). Best of luck and let me know how they turn out!